
A death valley day trip from las vegas sounds simple until you start mapping it out. The park sits about two hours from the Strip, but Death Valley is huge, and picking the wrong route or the wrong season can turn a fun outing into hours of driving in 110-degree heat with nothing to show for it. If you’ve got one day, you need a plan that actually works.
This guide gives you exactly that. You’ll get the best driving routes from Las Vegas, realistic drive times depending on which entrance you use, and a sample itinerary that hits the highlights without doubling back across the park. We’ll cover when to go, what to pack, and how to time your visit around the sun so you’re not stuck at Badwater Basin at 2pm in July.
We’ll also walk through when a guided tour makes more sense than driving yourself, especially if you’d rather sit back and let someone else handle navigation, timing, and safety in one of the harshest landscapes in the country. Whether you’re planning to self-drive or book a tour, by the end of this article you’ll know exactly how to make the most of your one day in Death Valley.
What to know before planning your day trip
Before you plug an address into your GPS, understand what you’re actually dealing with. Death Valley National Park covers over 3.4 million acres, making it the largest national park in the contiguous United States. That size catches a lot of first-time visitors off guard. You can’t "see Death Valley" in the way you might see a smaller park like Zion. A death valley day trip from las vegas only works if you accept upfront that you’re seeing a slice of the park, not the whole thing, and plan your route around that reality.
How big the park really is
Most people picture Death Valley as a single valley you drive through and out the other side. It’s not. The park stretches roughly 140 miles north to south and includes mountain ranges, sand dunes, salt flats, and canyons that are hours apart from each other. Furnace Creek, the park’s unofficial hub with the visitor center and gas station, sits close to the middle. From there, popular spots like Badwater Basin and Zabriskie Point are a short drive, but Ubehebe Crater in the north is a separate 90-minute detour on its own.
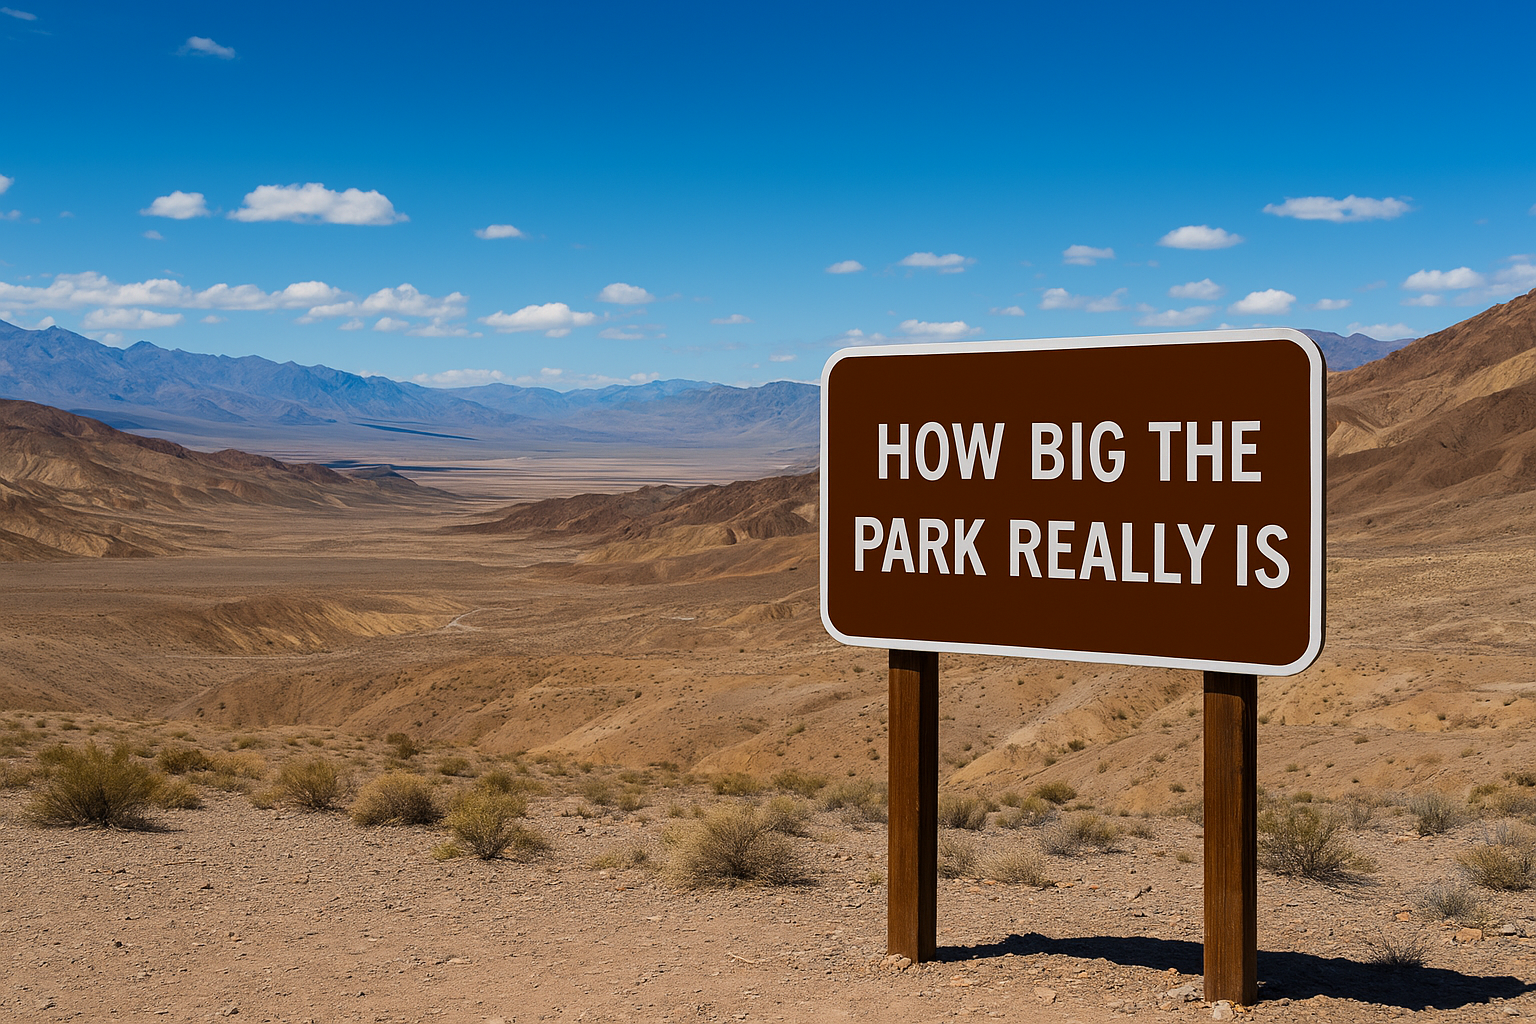
Death Valley isn’t a park you drive through in an afternoon. It’s a park you pick three or four stops from and plan your day around.
Entrances and how you’ll get in
There’s no gate you stop at to pay, unlike parks such as Zion or Yosemite. You self-pay at kiosks near the main entrances, and rangers do check for a valid pass or receipt inside the park. The two routes most Las Vegas travelers use are through Pahrump on NV-160 and CA-127, or through Death Valley Junction. Both drop you near Furnace Creek, which is your best starting point for a single-day visit.
Cell service is basically nonexistent
Don’t count on your phone once you’re past Pahrump. Cell coverage inside the park is spotty at best and nonexistent at most viewpoints, including Badwater Basin and Dante’s View. Download offline maps before you leave Las Vegas, and consider grabbing a printed park map at the visitor center. This matters more than most first-timers expect, because a wrong turn with no signal can cost you 30 minutes you don’t have on a day trip.
Entry fees and how to pay
Every vehicle entering Death Valley needs a valid pass. Here’s what that looks like in practice:
| Pass type | Cost | Valid for |
|---|---|---|
| Vehicle pass | $30 | 7 days |
| Individual (foot/bike) | $15 | 7 days |
| America the Beautiful Annual Pass | $80 | 12 months, all federal parks |
You can pay at self-service kiosks near park entrances or online through the National Park Service website before you go, which saves time if you’re trying to squeeze every minute out of a single day. If you’re already holding an annual pass from a previous national park visit, bring it. It covers your entire vehicle at no extra cost.
Know your limits before you commit
A day trip to Death Valley is not a casual outing, especially between May and September when daytime highs regularly top 110°F. If you’re traveling with young kids, elderly family members, or anyone with heat sensitivity, be honest about whether a full day in that environment is realistic. Plenty of visitors do a shortened version instead, hitting two or three stops near Furnace Creek and turning around by early afternoon. That’s a smart call, not a compromise, and it’s exactly the kind of decision a guided tour service can help you make before you’re already committed to a long, hot drive.
Step 1. Choose the best time to visit
Timing makes or breaks a death valley day trip from las vegas. Pick the wrong month, or even the wrong hour, and you’ll spend your visit retreating to the car instead of standing at an overlook. The good news is that Death Valley rewards planning. Once you know the seasonal patterns and how the sun moves across the valley floor, you can build a day that actually feels comfortable instead of like an endurance test.
Best months for a day trip
October through April gives you the most workable weather, with daytime highs in the 70s and 80s at lower elevations. November through March is ideal if you want mornings cool enough for a short hike near Golden Canyon or Mosaic Canyon. Summer is a different story entirely.
| Season | Typical daytime high | Recommended for day trips |
|---|---|---|
| Nov – Mar | 65-80°F | Yes, best conditions |
| Apr / Oct | 85-100°F | Yes, with early start |
| May / Sep | 100-110°F | Caution, plan around midday |
| Jun – Aug | 110-125°F | Not recommended without AC-reliant plan |
If you’re choosing a single month to visit Death Valley from Las Vegas, pick anything between November and March and skip the guesswork entirely.
Why time of day matters as much as season
Regardless of which month you go, the middle of the day is your enemy. Sun exposure peaks between 11am and 4pm, and that’s when temperatures climb fastest and shade disappears almost entirely. Structuring your day trip itinerary around early morning and late afternoon stops, with a long lunch break indoors or in the car with AC running, keeps you out of the worst heat while still covering the highlights.
Weekday versus weekend crowds
Spring and fall weekends bring noticeably more traffic to Furnace Creek and Zabriskie Point, especially during spring break weeks. Visiting on a Tuesday or Wednesday means shorter waits at overlooks and easier parking at trailheads like Mesquite Flat Sand Dunes. If your schedule allows it, a midweek trip stretches your limited daylight further since you’re not waiting behind tour buses at the popular photo spots. This is a minor factor compared to season, but it adds up when you’re only giving yourself one day to see the park.
Step 2. Map your route and driving time
Once you’ve settled on a season, the next task is nailing down which road gets you into the park fastest with the least hassle. The distance from Las Vegas to Death Valley runs about 120 to 140 miles depending on your entrance point, but the drive time swings more than the mileage suggests because of speed limits, elevation changes, and how far past Pahrump you’re going. Getting this part right shapes everything else about your day, from what time you leave your hotel to how many stops you can realistically fit in before dark.
The two main routes
Virtually every Las Vegas visitor picks one of two paths into the park. Both are paved the whole way and don’t require a high-clearance vehicle.
| Route | Distance | Drive time | Notes |
|---|---|---|---|
| NV-160 through Pahrump to CA-127 | ~120 miles | 2 – 2.25 hours | Most direct, fewer turns, good gas stop in Pahrump |
| US-95 to Death Valley Junction | ~140 miles | 2.25 – 2.5 hours | Slightly longer, quieter road, enters near Zabriskie Point |
Either route lands you close to Furnace Creek, so the choice mostly comes down to whether you’d rather gas up in Pahrump or take the marginally quieter road through Death Valley Junction. Neither one saves you enough time to obsess over; pick whichever feels more familiar and move on to planning your stops.
What the drive time really means for your day
Doing the math on a round trip changes how you should think about the day. Four to five hours of driving out of a roughly twelve-hour daylight window leaves you with six to seven hours inside the park, and that’s before you subtract time for lunch, restroom breaks, and photo stops along the way.
Budget four to five hours for driving alone, because that number decides how many stops you can realistically add to your itinerary.
Setting out by 6 or 7am gives you the fullest day possible and gets you to Zabriskie Point or Dante’s View while the light is still soft. Leaving any later than 8am starts eating into usable time fast, especially if you’re hoping to catch both a morning and a late-afternoon viewpoint before the drive back.
Fuel and cell service along the way
Gas up before you leave the Strip or top off in Pahrump, since prices inside the park at Furnace Creek run noticeably higher and stations are limited. Remember that cell service disappears well before you reach the entrance, so download your route offline rather than counting on live traffic updates once you’re past Pahrump.
Step 3. Decide between self-driving and a guided tour
Once you know the route and the drive time, the real question is whether you want to be the one behind the wheel for four to five hours in desert heat. Self-driving gives you total control over your schedule and stops, but it also means you’re the navigator, the driver, and the safety net if something goes wrong, all on roads with no cell service and long stretches between gas stations. A guided tour flips that equation: you give up some flexibility in exchange for someone else handling logistics, timing, and the heat-related risks that catch first-timers off guard.
What self-driving actually requires
Driving yourself works best if you’re comfortable navigating with offline maps, confident managing a vehicle in extreme heat, and willing to build in buffer time for the unexpected. You’ll need to plan fuel stops carefully, since running low on gas near Furnace Creek isn’t a minor inconvenience, it’s a real problem. You’re also responsible for pacing the day so you’re not standing at Badwater Basin at 2pm in July.
What a guided tour changes
A guided tour removes most of that mental load. Guides know which stops are worth your limited hours, how to time them around the sun, and how to adjust the plan if weather or road conditions shift. Another Side Tours builds Death Valley experiences with this exact problem in mind, pairing knowledgeable local guides with comfortable, climate-controlled vehicles so you’re never the one white-knuckling a drive through 110-degree heat.
If you’d rather experience Death Valley than manage it, a guided tour trades a little flexibility for a lot less stress.
Quick comparison
| Factor | Self-driving | Guided tour |
|---|---|---|
| Flexibility | Full control over stops and pace | Set itinerary, less improvising |
| Navigation risk | You handle it, no cell service | Guide handles it |
| Heat/safety management | On you | Built into the plan |
| Cost | Gas + entry fee only | Higher upfront, all-inclusive |
| Best for | Confident drivers, flexible schedules | First-timers, families, groups wanting ease |
Neither option is objectively better. If you’ve driven in remote desert conditions before and like planning your own route, self-driving saves money and gives you freedom to linger wherever you want. If this is your first trip to Death Valley, or you’re traveling with people who’d rather relax than track fuel gauges and offline maps, a guided tour turns a potentially stressful drive into an easy, narrated day out. Either way, deciding now, before you’re standing in a rental car lot, saves you from making that call under time pressure.
Step 4. Build your itinerary and top stops
With your route and drive time locked in, the next job is deciding what actually goes on the map. Six to seven hours inside the park sounds generous until you realize Zabriskie Point and the Mesquite Flat Sand Dunes sit 25 minutes apart, and Ubehebe Crater is another 90 minutes north of that. The goal isn’t cramming in every named viewpoint. It’s picking a cluster of stops close enough together that you’re not burning your whole day driving between them.
The core loop most day-trippers should stick to
For a single day, build your itinerary around Furnace Creek as the hub and stay within roughly a 30-minute radius of it. That gives you time to actually stand at each stop instead of photographing it through a windshield.
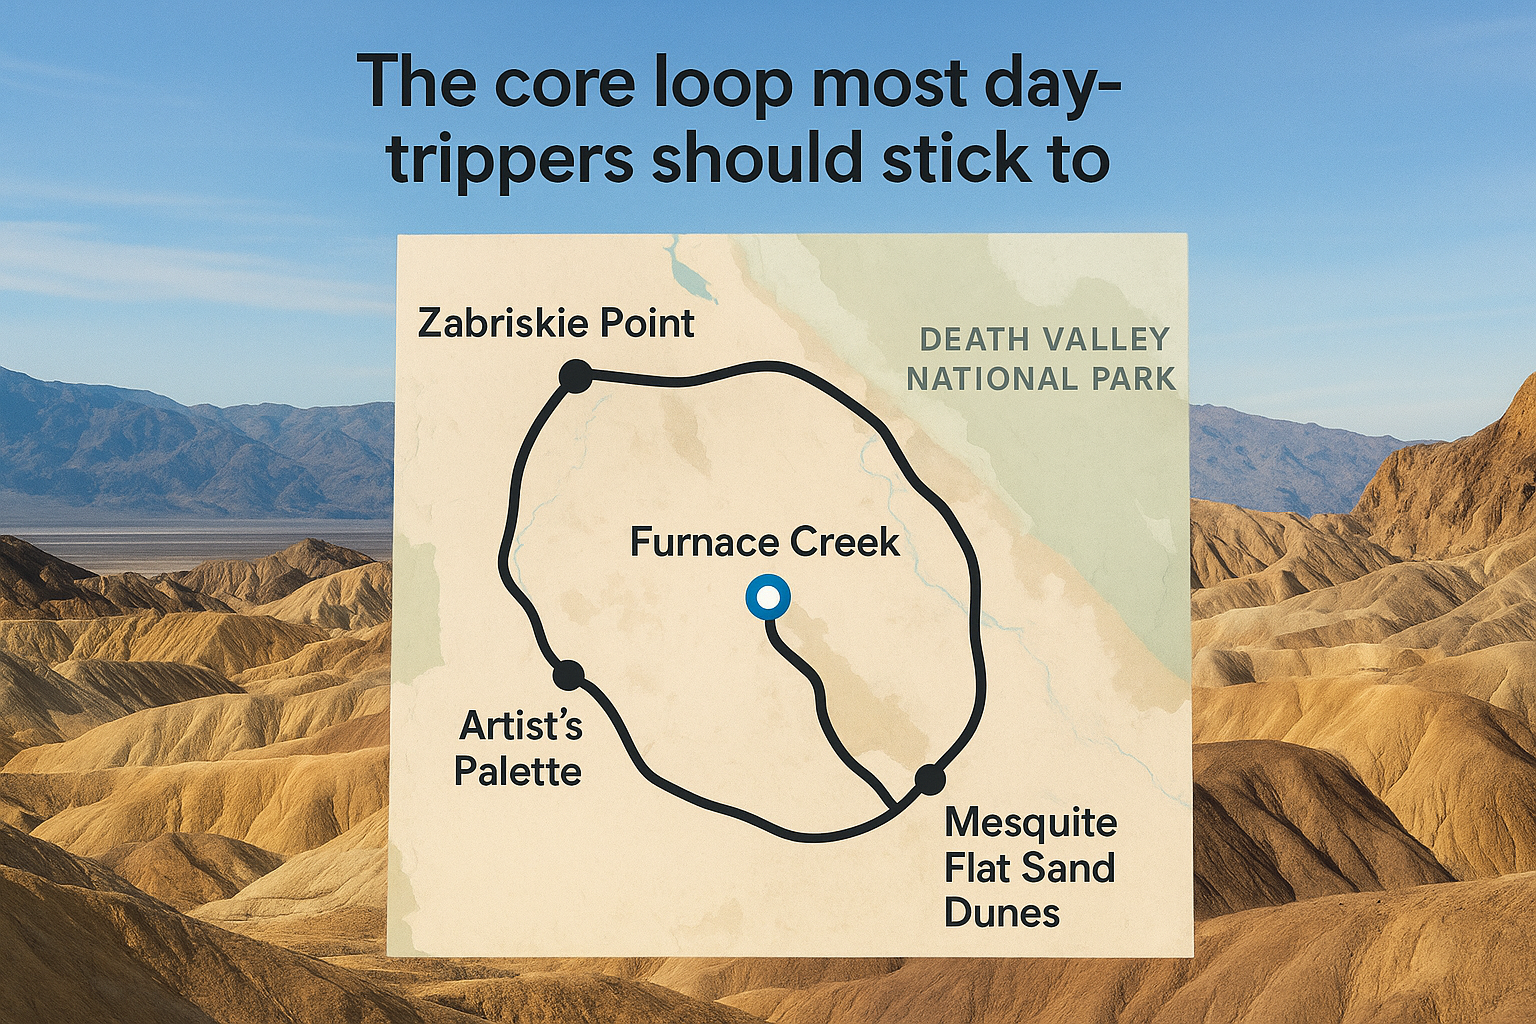
- Zabriskie Point: best right after sunrise, badlands glow gold and it’s an easy 5-minute walk from the parking lot
- Badwater Basin: lowest point in North America at 282 feet below sea level, go before 10am to avoid peak heat on the salt flats
- Artist’s Palette: a 9-mile scenic drive with mineral-streaked hills, best light in late morning
- Furnace Creek Visitor Center: air-conditioned break, exhibits, and your best shot at a bathroom and bottled water refill
- Mesquite Flat Sand Dunes: near Stovepipe Wells, good for a late-afternoon stop if you’re heading out via the northern route
Pick four stops near Furnace Creek instead of six spread across the park, and you’ll actually enjoy each one instead of rushing through all of them.
Sequencing your stops around the sun
Order matters as much as selection. Hit Zabriskie Point first thing, since it faces east and looks best in morning light. Move to Badwater Basin next, before the salt flat turns into a shadeless furnace by midday. Save Artist’s Palette for late morning when the colors show up best, then retreat to Furnace Creek for lunch and AC during the hottest stretch of early afternoon. If you’ve got energy left, close the day with Mesquite Flat Sand Dunes on your way back toward Las Vegas, since it sits along the Stovepipe Wells route and works well in late-afternoon light.
Building in slack
Leave at least 30 to 45 minutes of unstructured time in your plan. Trailheads get crowded, restrooms have lines, and you’ll want a few unplanned minutes just to stand somewhere and take it in instead of checking your watch. A tight itinerary with zero buffer is the fastest way to turn a great day trip into a stressful one.
Step 5. Pack the essentials for desert travel
What you throw in the car before leaving Las Vegas matters as much as your route. Death Valley has almost no infrastructure once you’re past Furnace Creek, so a forgotten water bottle or dead phone charger becomes a real problem instead of a minor annoyance. Packing right for a death valley day trip from las vegas means treating the desert like a place with zero backup plans, because that’s exactly what it is.
Water and food come first
Bring more water than you think you need. A gallon per person for the day is the standard recommendation, and that’s before you factor in extra heat from an unexpected delay or a longer hike than planned. Skip relying on the gift shop at Furnace Creek for your main water supply since lines get long and prices run high. Pack snacks and a simple lunch you can eat in the car with the AC running, since restaurant options inside the park are limited and sitting down to eat eats into your limited daylight.
Pack a gallon of water per person, not a bottle, because Death Valley doesn’t give you a second chance to find more.
Gear that actually gets used
A few items pull double duty and are worth the trunk space:
- Sunscreen and a wide-brim hat: reapply every couple hours, shade is nearly nonexistent at most stops
- Sunglasses: the salt flats at Badwater Basin reflect glare hard enough to strain your eyes fast
- A physical paper map or printed directions: cell service disappears past Pahrump, and offline map apps sometimes glitch
- A basic first aid kit: cuts and blisters happen, and the nearest pharmacy is over an hour away
- A car phone charger: you’ll use your phone’s GPS and camera all day even without signal
Vehicle prep matters too
Check your tire pressure and oil before you leave, and confirm you’ve got a full tank of gas. Breaking down on a road with no cell service and temperatures over 100°F isn’t a minor inconvenience, it’s a genuine safety issue. Toss a few extra bottles of water in the trunk specifically for the car, separate from your drinking supply, in case you need to cool down an overheating engine. If any of this sounds like more prep than you want to manage on vacation, it’s worth remembering that guided tours handle every one of these details before you even get in the vehicle, which is exactly the appeal for travelers who’d rather show up and enjoy the day than run through a packing checklist at 5am.
Step 6. Budget for fees, gas, and food
Money matters shape a death valley day trip from las vegas just as much as route and timing, and most first-timers underestimate the total by ignoring gas and food while only budgeting for the entry fee. Knowing the real numbers ahead of time keeps you from getting surprised at a gas pump inside the park where prices run noticeably higher than anything you’d pay in Las Vegas.
What a self-driving day trip actually costs
For a typical group traveling in one vehicle, here’s a realistic breakdown for a single day:
| Expense | Estimated cost | Notes |
|---|---|---|
| Vehicle entry pass | $30 | Covers everyone in the car for 7 days |
| Gas (round trip, 240-280 miles) | $35-$50 | Varies by vehicle, fill up in Pahrump |
| Food and snacks | $20-$40 per person | Pack most of it, buy little inside the park |
| Bottled water (backup) | $10-$15 | Beyond what you pack from home |
| Total for a group of 4 | ~$150-$220 | Excluding lodging |
Budget for gas and food the same way you budget for the entry fee, because skipping that step is the most common mistake self-drivers make.
Where the real savings and expenses hide
Gas is the line item people forget to plan for, and it adds up fast on a 240 to 280 mile round trip depending on your route. Filling your tank in Pahrump on the way out costs meaningfully less than topping off at Furnace Creek, where limited competition keeps prices high. Food works the same way. Packing sandwiches, fruit, and snacks in a cooler costs a fraction of what you’d spend at the small cafe near the visitor center, and it saves time you’d otherwise lose sitting down to eat.
Factoring in a guided tour instead
If you’d rather skip the math entirely, a guided tour bundles most of these costs into one upfront price. Another Side Tours’ Death Valley experiences typically include transportation, guide expertise, and sometimes food or water, which removes the guesswork of estimating gas, fees, and snacks separately. It costs more per person than a bare-bones self-drive, but for travelers who’d rather pay once and skip the spreadsheet, that trade-off often makes sense. Comparing the two approaches side by side before you commit helps you decide whether the extra convenience is worth the difference in price for your specific group.
Step 7. Follow safety tips for extreme heat
Heat is the single biggest risk on a death valley day trip from las vegas, and it kills a handful of visitors nearly every year, most often because they underestimated how fast conditions turn dangerous. Nothing about this park forgives complacency. Treat the heat as the main hazard of the day, not a background detail, and you’ll avoid the mistakes that actually cause trouble out there.
Know the warning signs before they show up
Planning for heat means recognizing trouble before it becomes an emergency. Watch for these symptoms in yourself and anyone traveling with you:
- Heavy sweating that suddenly stops: often the first sign your body is losing the fight against heat
- Dizziness or confusion: get to shade and AC immediately, don’t wait it out
- Nausea or headache: early heat exhaustion symptoms that worsen fast without water and cooling
- Rapid heartbeat or shallow breathing: signals you need medical attention, not just a water break
Heat exhaustion doesn’t announce itself politely. If someone in your group feels off, treat it as an emergency, not an inconvenience.
Rules that actually keep you safe
A few non-negotiable habits separate a smooth day from a dangerous one. Follow the National Park Service’s own guidance and don’t cut corners on any of these, especially in summer months:
- Never hike after 10am from May through September. The National Park Service closes many trailheads seasonally for this exact reason.
- Stay within sight of your vehicle on any short walk, since shade and rescue options are minimal.
- Run your AC constantly, even for short stops, rather than shutting the car off in a parking lot.
- Check on kids and elderly travelers every 20 to 30 minutes, since they show heat symptoms faster than healthy adults.
- Tell someone your planned route and return time before you lose cell service near Pahrump.
What to do if your car breaks down
Staying with your vehicle is almost always the right call if you break down. Cars are easier for rangers to spot than a person walking along a shoulder, and walking in extreme heat burns through your water fast while doing nothing to speed up help. Run the engine periodically for AC if you’re worried about overheating it further, and use your extra trunk water to stay cool rather than pushing forward on foot. This is exactly the kind of scenario a guided tour eliminates entirely, since you’re never the one responsible for roadside decisions in 115-degree heat.
Sample itineraries and tour options to consider
Seeing how all these pieces fit together in an actual schedule makes the whole plan click. Below are two realistic timelines, one for self-drivers and one that mirrors what a guided tour typically covers, so you can picture your own day before you commit to either approach.
A sample self-drive itinerary
This schedule assumes a 6:30am departure from the Strip and sticks to the core loop around Furnace Creek discussed earlier.
| Time | Stop | Notes |
|---|---|---|
| 6:30am | Depart Las Vegas | Fill gas tank in Pahrump |
| 8:45am | Zabriskie Point | Morning light, 5-minute walk |
| 9:30am | Badwater Basin | Before salt flats heat up |
| 10:30am | Artist’s Palette | Best color in late morning |
| 12:00pm | Furnace Creek | Lunch, AC, restroom, water refill |
| 2:00pm | Mesquite Flat Sand Dunes | Optional, weather permitting |
| 3:00pm | Depart for Las Vegas | Arrive by 5:30pm |
A well-timed self-drive itinerary isn’t about seeing more, it’s about seeing four stops well instead of six stops badly.
What a guided Death Valley tour typically includes
Guided options follow a similar route but hand off the logistics entirely. Another Side Tours runs Death Valley trips from Las Vegas built around this exact schedule, with a few advantages self-drivers don’t get automatically:
- Climate-controlled vehicle for the full drive, so the AC never becomes a variable you’re managing yourself
- Local guide narration at each stop, adding history and geology context you’d otherwise miss reading a small plaque
- Pre-planned timing around sunrise and heat, removing the guesswork from sequencing your stops
- Group or private options, so families and couples can choose the level of customization that fits their trip
Choosing between the two
Either itinerary above gets you to the same highlights, and neither one is wrong. Self-driving costs less and gives you total control over how long you linger at Badwater Basin or whether you skip the sand dunes entirely. A guided version costs more but removes the mental load of navigation, timing, and heat management, which matters most for first-timers, families with young kids, or anyone who’d rather listen to a guide than squint at offline maps in 105-degree heat.
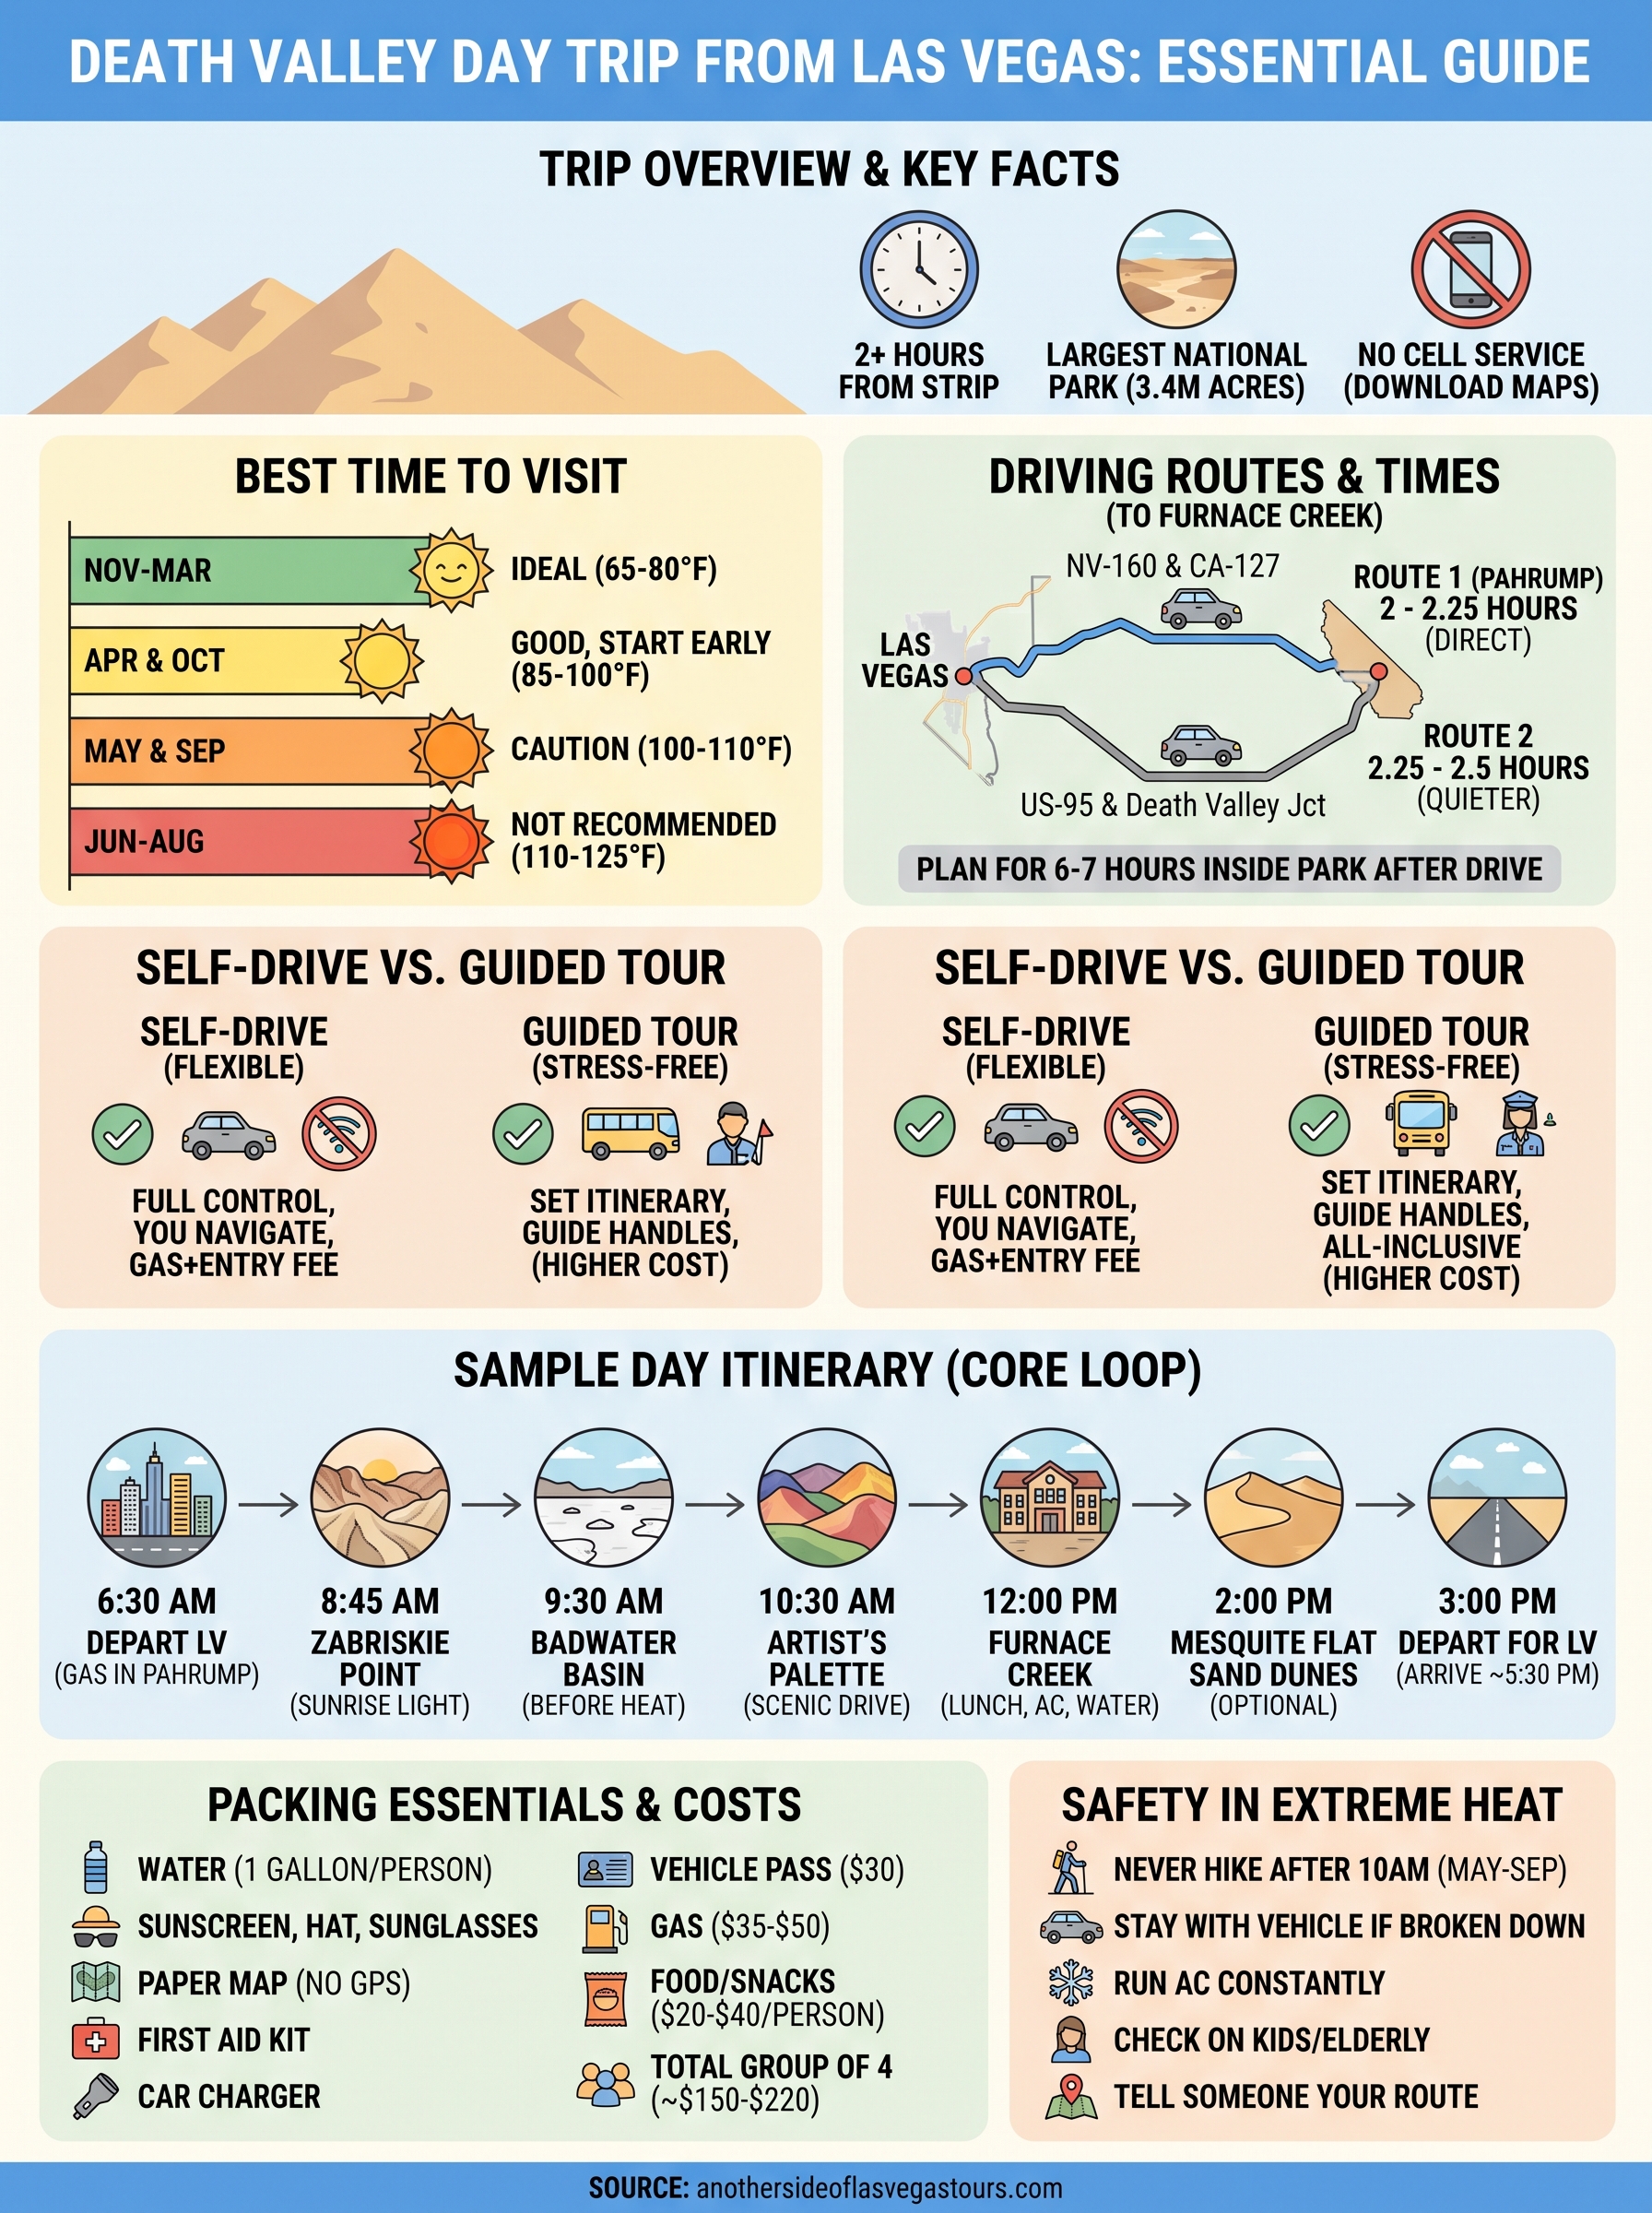
Making the most of your day in Death Valley
A death valley day trip from las vegas comes down to respecting three things: distance, heat, and how much ground you can realistically cover in six or seven hours. Pick a season that works in your favor, map a tight cluster of stops around Furnace Creek, and pack like there’s no gas station or gift shop coming to save you. Do that, and you’ll come home with the photos and stories instead of a story about sitting in traffic or overheating on a salt flat.
If you’d rather skip the spreadsheet of gas prices, water gallons, and heat-safety checklists, that’s exactly what a guided trip solves. You show up, someone else handles the driving, timing, and navigation, and you spend the day actually looking at the scenery instead of managing it. Ready to let someone else take the wheel? Explore custom private tours built around Death Valley and let a local guide handle the rest.